Thursday, January 26, 2012

Another quilt (top)

Yes, ladies! I'm making another quilt (top)! I love making quilt tops, I love how separate pieces of fabric turn into a beautiful and interesting quilt (top)! But.. yes, I only love making quilt TOPS! I've only made ONE complete quilt in my life and it was a small baby quilt made with a charm pack and I stitched in the ditch so you can say that I've actually made none of the REAL quilts..

Here it is

 Oh, how proud I was.. This "quilt" was also my first ever sewing project! (sewing lessons in 7th grade can't count, right?)

If you've been with me for some time then you'll know that this new quilt will be my 3rd quilt in process.. Shame on me, I know! BUT! Who doesn't have few unfinished projects hidden somewhere?


This quilt is for my hubby. I'm hoping to finish it for Valentine's Day. Shhh.. don't tell him ;) I'm actually aiming for a lap quilt. This time I'm not gonna be doing anything that's even a bit complicated and time consuming. Just 10"x10" squares sewn together, no batting and just something warm for the backing. Well, at least that's the plan.

I have two different patterns to choose from:

random pattern

organized pattern

Hmmm...which one should I go for?

Thursday, January 19, 2012

1001 views!

I'm on 1001 views today! Thank you to all my readers! Thou I'm not blogging about anything special and despite my poor English you still take time to visit me! I'm very grateful for that! And a thank you to Blogger too :)) I don't think I would be able to carry on without knowing that I do have visitors! :)


These are origami flowers that my brother-in-law and I made a while ago for my mother-in-law's birthday. He made the flowers and I helped him with stems and leaves.


The flowers are lilies. You can find a lot of tutorials on the Internet. First we wanted to make them "the right way" from origami paper. (how is it called? Can't remember that word? something M.. moshi? :)) But the store near our house that used to sell them closed down and we were in a hurry so we went to Officeworks and got some red and green A4 cardstock paper. And that was the correct decision! Big bold red flowers are absolutely beautiful! And thanks to the thickness of the paper I could attach them to the wire stems  without any problems. What do you think?

Tuesday, January 17, 2012

Liberty of London

I finally got my first Liberty fabrics. Wow.. I've been hearing about Liberty for some time but I didn't see it on sale anywhere. Then I recently came across Liberty bundles so I bought some without hesitation thou Liberty IS pricey..

Floral Tana Lawn fabrics

And now I know why.. It is absolutely gorgeous!! 100% cotton but it feels like SILK! I am so impressed! This is my favourite type of fabrics. It's perfect for feminine summer garments, something like a blouse or a light, "floating" dress..  I'm definitely buying more!

I tested these fabrics on buttons and they turned out beautiful!


These earrings are gonna be on my Etsy very soon :)

Flower garden quilt

I wanted to clean up my working space so I dig straight into my scraps... Most of them aren't scraps from my projects, they're from scrap bags that I actually purchased for my fabric buttons. But after some time I realized that scrap bags aren't the best option for my fabric button creations (what a word!)


I never realized that I had this much.. It looked a lot less folded and stacked..

All my flower pattern scraps

I sorted out all pieces with flower patterns to make a quilt (most likely) I don't really have a design in mind or anything I just really want to "get rid" of all this scraps :)) So first thing.. I sort them by colors

(I don't know why this picture keeps rotating itself after uploading. Sorry but I don't know how to fix that)

Then normally you should trim all pieces to the same size but the perfectionist in me went to sleep so the busy mummy could do some sewing :)) I didn't lay out the pattern either. It wasn't necessary for this quilt. I just took everything straight to the sewing machine and started sewing pieces together..


Then I sewed pieces-of-2 together..


Then I sewed together pieces-of-4 and in the result I have 7 long strips (an uneven number will be a bit of a problem here :))


I think it looks lovely! I'm happy and ready to have a good night sleep.. :)


Monday, January 16, 2012

a double happy day

Today is my double happy day! How could you not be happy to receive this?


My craft books are here! Its my first time buying from Amazon and I didn't expect them to arrive this early! I used to buy from Australian websites. My favourite was Fishpond because they have free shipping so you know from  the start how much you;re paying. But then most of their books are located in the US or UK so it normally takes a month for the books to arrive here. I decided to try Amazon and I'm very happy! With shipping (normally 5-6$/book) it is still cheaper than to buy in Australia and now I know that it also arrives earlier!

How lovely is this?

Sewing for girls. I saw this book on RetroMummy's blog and decided to check it out. I normally check all books on Amazon because they have that "Look Inside" option then I would buy from Australian websites but not any more...


The inside is even cuter! Makes me want to start sewing right away..

And why am I double happy? Because something else arrived today as well..


Oh my..! I can't get over pretty pre-cuts! I wish I had a lot of kids or relatives around :))

Wednesday, January 11, 2012

Zig zag skirt

Just wanted to show you the finished zig zag skirt. I finished it just in time for Christmas so I didn't have time to take proper pictures.

I used Moda's "A walk in the woods" fabrics

It's different from other charm pack skirts that I've been making so I really enjoyed it. It is more complicated and time consuming but it totally worth it! Don't you think? It does create a lot of seams thou so I think an underskirt is really necessary.

This skirt is Polkadot Chairs's design. You can find the free pattern here.

To make a size 4-5T skirt I used:
12 pink charm squares (from 2 Moda's A walk in the woods charm parks)
12 white charm squares (from bella solids white charm pack)
3 strips (from 1 A walk in the woods jelly roll - the rest of the strips can be used to make 3-4 beautiful jelly roll skirts!)
a piece of fabric for underskirt
some elastic

I followed the tutorial and sewed the pink and white squares together, cut them diagonally in the middle and pressed them


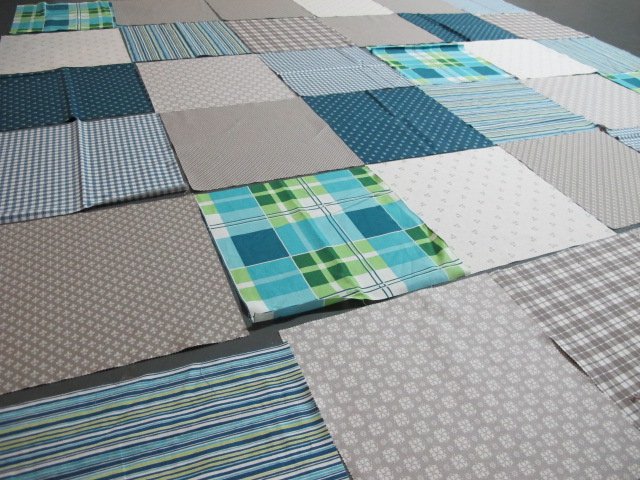
Laid out the pattern


Cut the corners and sewed the squares together


There were so many seams that I couldn't sew through with a normal foot so I'm glad I had a chance to use my newly purchased walking foot for the first time!

All my new feet. I'm really glad I finally bought a 1/4" seam foot!

Then I sewed jelly roll's strips to the skirt, cut out the underskirt, surged the bottom of the underskirt and gathered the top together with the skirt using the surger


Attached one more strip to the top of the skirt to make a waistband and one more strip to the bottom then stitch the side seams together. ( I did it a bit differently from the tutorial). Folded the bottom and top of the skirts and stitched them in place. Then I fed the elastic through the waistband, hand stitched the opening and pressed one last time. And the result is here


Tuesday, January 10, 2012

my first rocky road

So I had this sudden crave for white chocolate and we only had some white chocolate melts in the pantry which I didn't really wanted to eat just like that ( oh well, I did eat a few before I found a recipe) I had cake pops in mind - that was why the melts were there but it;s too much trouble having to make cake pops just for the white chocolate. And then I remembered retromummy's recipe for rocky road. Quick and easy enough to make while babysitting at the same time. Plus, I had all the ingredients:


The original recipe is a bit different. I made my rocky road from scratch and added some other things in.. I had some super white melts left from making cake pops for my brother-in-law's birthday. Oooh, I have to show you the photo. I was just so proud of myself :D

You have to love cake pops and Bakerella!

And back to the rocky road.. This is how it looked when wet


And this is how it looked one hour later


Chopped up and ready to eat! Yum!!!


Mine doesn't look as "rocky" as Retromummy's. White chocolate was what I was after. I had thoughts of dropping all the ingredients and make chocolate bars instead :D

So the ingredients I used were:

300gr white chocolate melts
1/2 bag of marshmallows
1/2 chewy lollies chopped up (kids love them. My teeth - don't. So don't think I'm gonna use anything chewy next time)
some shredded coconut
a bit of chocolate chips
a bit of sprinkles

Melt the chocolate following the instruction. Mix with the rest of the ingredients and put in anything with corners. I put it in a plastic container lined with baking paper. Retromummy suggests putting it in the fridge for at least half an hour. I did that but after taking it out it started sweating a lot, esp in this crazy hot weather so next time I'll just leave it outside to harden. Then chop it up and enjoy!

Tuesday, January 3, 2012

First blog of the year

Happy new year everyone! Hope you had/are having great holidays with your family and friends!
I'm having wonderful time with my extended family. Not much crafting and a lot of eating!

The quilt top for my nephew. Still a lot to do.

It's a new year and a new month so I was concentrating on restocking Handmade Highstreet. Triple work to do because I'll be away till mid-March. But luckily I got some help from my two little cousins  ;) 


And the stock is ready and waiting to be send to the store!

A lot of earrings and hair pins!

This wood button pins are new! Cuter and more durable!

And I'm off to the post office!